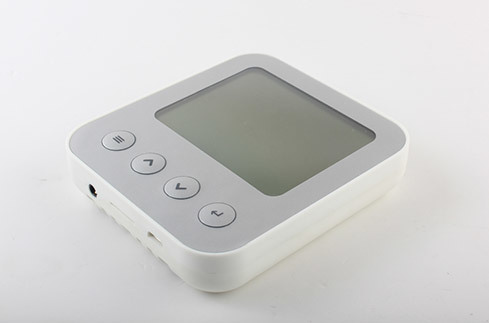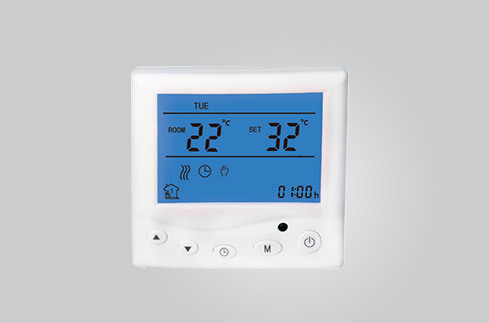
Digital Heating Thermostat ILH119
These series of digital heating thermostat, applying the most advanced and international standardized microcomputer control chip, measures the temperatures through the in-built and external high-precision sensor. It can make a real-time comparison with the parameters set by the user, automatically start and stop the heating equipment to maintain the room in a certain temperature point. It can set 6 time periods and corresponding temperature every day, and can select manual control or temporary manual control. The particular double sensor control function reinforces temperature detection on the heating equipment while detecting the room temperature.
Retail Price:
$ 0
Remaining Stock
Category:
Fan Coil Thermostats Series
Keyword:
Digital Heating Thermostat
Service Hotline:+86-10-8775-5626
Inquiry Email:jocko@ilamps-trade.com
- Product description
- Technical data
- Measurement
-
- Commodity name: Digital Heating Thermostat ILH119
These series of digital heating thermostat, applying the most advanced and international standardized microcomputer control chip, measures the temperatures through the in-built and external high-precision sensor. It can make a real-time comparison with the parameters set by the user, automatically start and stop the heating equipment to maintain the room in a certain temperature point. It can set 6 time periods and corresponding temperature every day, and can select manual control or temporary manual control. The particular double sensor control function reinforces temperature detection on the heating equipment while detecting the room temperature.
Alternative Working Modes Table
Optional functions
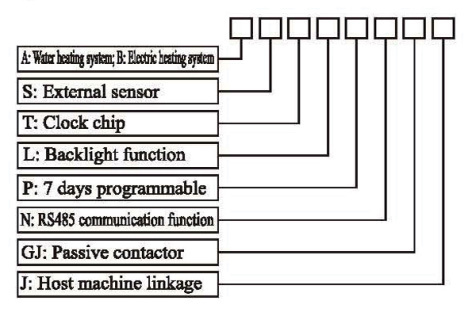
Display and Function Description
●
 : Manual working mode. Under the manual mode, the heating equipment can be controlled through resetting its current temperature manually.
●
 : Programmable working mode. The thermostat runs automatically according to the setting time period and temperature point.
● Programmable working mode: 7-day programmable is divided into two periods, respectively “12345”/ "67" 5+2 programmable working mode. Each working mode is subdivided into six periods and six corresponding temperature settings.
●
 : Getting up in the moming, the first period
●
 : Going out in the morning, the second period
●
 : Back home at noon, the third period
●
 : Going out at noon, the fourth period
●
 : Back home in the evening, the fth period
●
 : Sleeping at night, the sixth period
●

 : Temporary manual working mode: under the current programmable working mode peniod, switching to the temporary manual state for a while, and it will automatically switch back to the programmable period control state when the next period approaches (temperature set under the temporary manual working mode will not be stored).
● Press "M" to switch over to the manual mode.
●
 : Button locking state. Press“▲" and“▼” at the same time for at least 5s to lock the themostat buttons, and then press them meanwhile for at least 5s for unlocking.
●
 :Heating state. When the icon glitters, it means that the heating source exceeds the Max limited temperature and the load is cut off. If powered off, the icon may also glitter when the antifreezing protection starts the load.
● Extermal temperature: floor temperature. It can only display on the screen after finishing selecting in-built and external temperature sensors. After selecting the sensortype "Al"” in the senior options, keeping pressing "▲",the screen will display the temperature of extermal sensor. IFf you release it the screen will go back to the previous state 3 seconds later. (Optional:this option is only available to double sensor configuration)antifreezing protection starts the load.
Button Description and Operation
•
 : Power on/off button for selecting to turn on or off thermostat. If it’s on, the LCD will display its working data and the thermostat will operate under one of the below three working modes: manual mode, programmable working mode and temporary manual working mode. If it’s off, the LCD will display none. And the working state and senior parameters before powered off will be stored. “M:” model button. It refers to the switchover between manual model and 7-day programmable model. It is ineffective under the communication mode.
•
 : Clock program button. Firstly, we need to setup the correct time. Turn on thermostat, then press the button “
 ” to setup Minute/ Hour/ Day. The adjusting sequence of the clock is below: minute adjustment→hour adjustment→week adjustment→back to original state. Press the buttons ▲ or ▼ to correct the time.
• Next, we can go to setup the week program. Turn on thermostats, keep pressing the button “
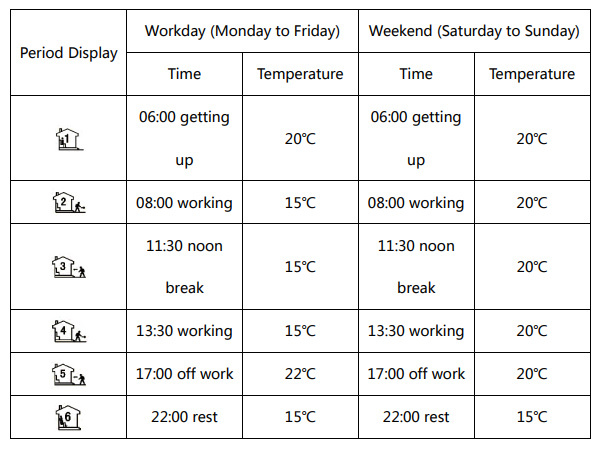
 ” for 3 seconds to setup the week program. The adjusting sequence is below: adjustment of time for the first period from Monday to Friday→adjustment of temperature for the first period from Monday to Friday→ time and temperature for the second period from Monday to Friday→…→adjustment of time and temperature from Saturday to Sunday. ( refer to the following attached table).
• After each parameter is finished setup, press “
 ” to switch to next parameter setup. Press "▲" and "▼" to adjust the glittering parameter (time adjustment with 15 minutes step; "▼" sets temperature drop or adjusts the set value of work mode. "▲"sets temperature rise or adjusts the set value of work mode.
Setting Time and Temperature Program
(Attached table)
Wiring Diagram
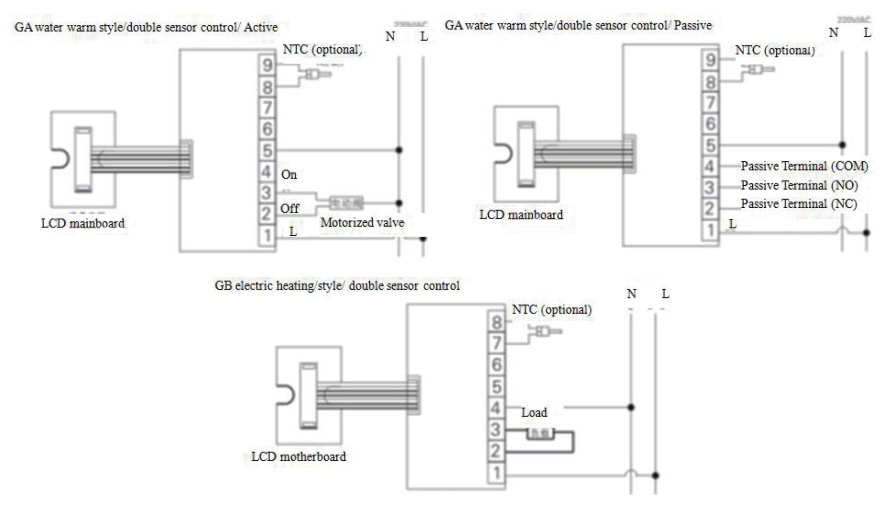
Remarks : this figure is only for reference. The exact wiring way is subject to the wiring diagram on the back of the power box.
Description of Infrared Remote Controller and Function
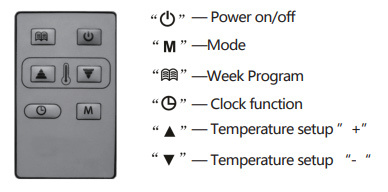
-
Technical Data
— Power self-consumption : <1.5W
— Timing error : <1%
— Power voltage : 220VAC 50/60HZ
— Load current: GA: 3A GB : 16A/25A
— Temperature control range : 5℃-35℃
— Temperature accuracy : ±1℃
— Outline size : 86mm x 86mm x 13 (height x width x thickness) -
Measurement
Previous:
Related Documents
-
File size: 3.9MB

